

Draining and re-filling a sealed heating system

Planning to install a new radiator or fix that annoying leak? You’ll need to drain and refill your sealed central heating system first. Don’t worry: it’s not as scary as it sounds, and with the right approach, you can tackle this yourself without flooding your floors or damaging your boiler.
Safety First: Always consult your boiler manual before starting, and if you’re not confident about any step, call in a professional. Incorrect draining or refilling can cause expensive leaks, system damage, or even void your boiler warranty. When in doubt, it’s better to be safe than sorry.
Why You Might Need to Drain Your Heating System
There are several reasons you might need to drain your sealed heating system:
- Installation of a new boiler or new hot water cylinder
- Installing new radiators or replacing old ones
- Fixing leaks in pipework or radiator connections
- Performing annual maintenance or power flushing
- Adding central heating inhibitor to protect against corrosion
- Replacing thermostatic radiator valves (TRVs)
Most modern UK homes have sealed (pressurised) systems rather than open-vented ones, so this guide focuses specifically on sealed systems with filling loops and pressure gauges.
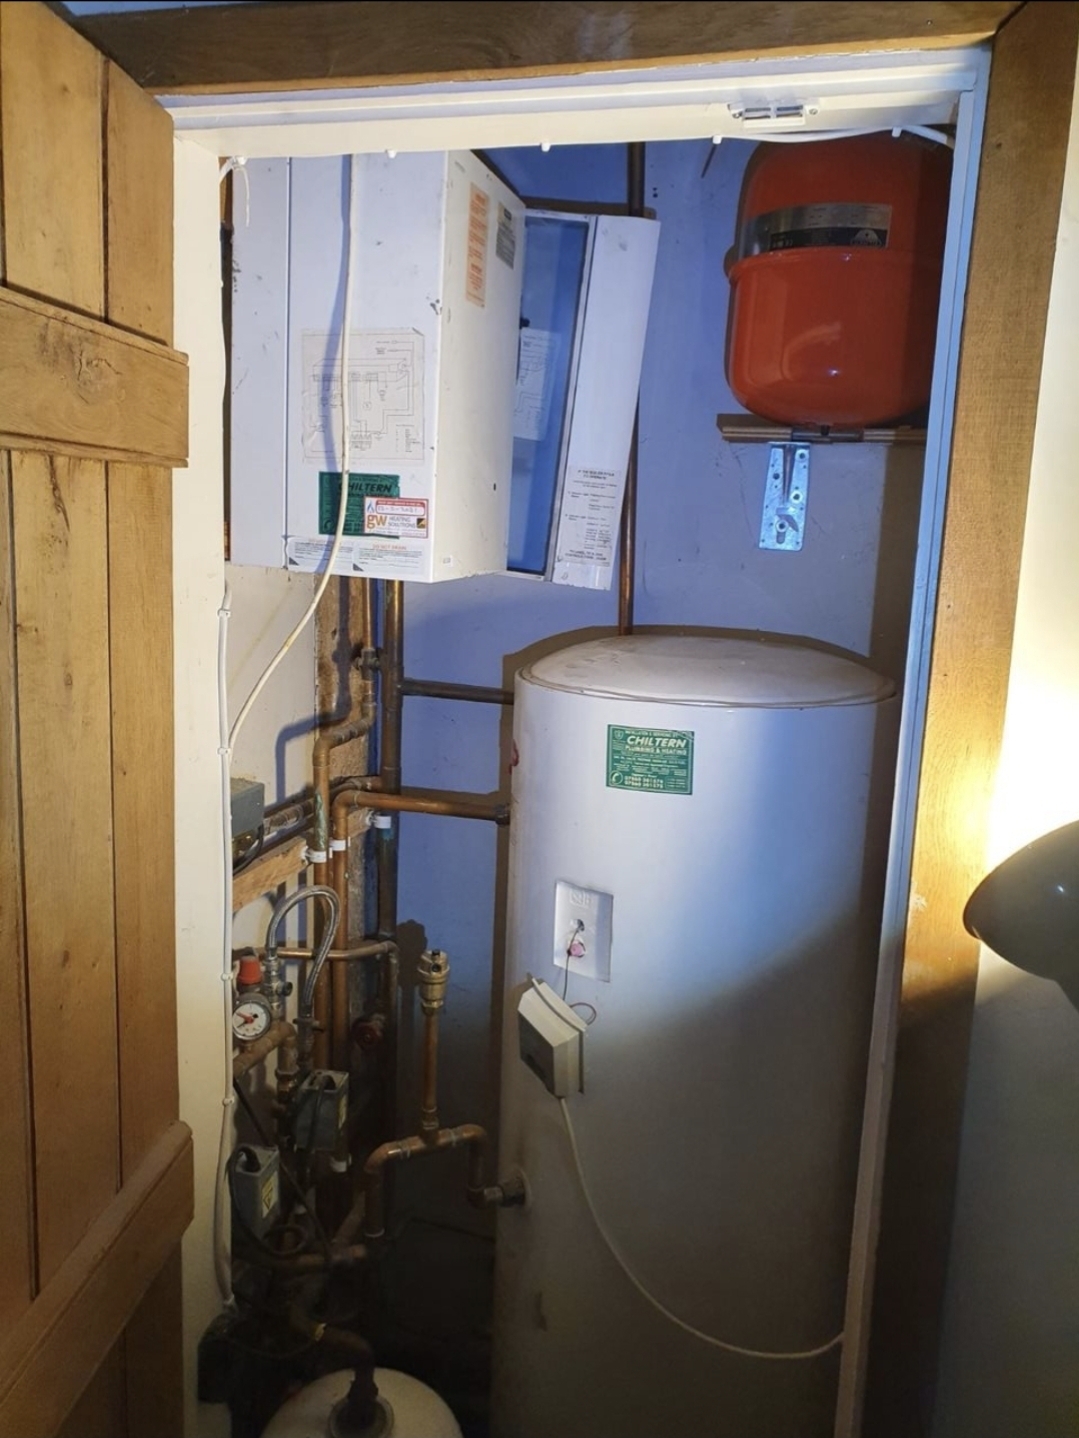
What You’ll Need Before Starting
Before you begin draining your boiler system, gather these essential tools:
• Garden hose (long enough to reach from your lowest radiator to outside)
• Jubilee clips or hose clamps
• Small container or bucket
• Radiator key (for bleeding)
• Adjustable spanner or pliers
• Towels or old sheets to protect floors
• Central heating inhibitor (optional but recommended)
Step-by-Step Guide: How to Drain a Boiler System
Step 1: Turn Off and Isolate Your Boiler
Start by switching off your boiler at the unit itself, then disconnect it from the mains power supply for safety. Wait at least 30 minutes for the system to cool down completely: hot water can cause serious burns, and you don’t want to be working with scalding pipes.
Step 2: Locate Your System’s Drain Valve
Find the lowest radiator in your house (usually ground floor or basement). Look for the drain valve: it’s typically a small brass or plastic fitting near the bottom of the radiator. In some homes, there might be a dedicated drain point on the main pipework instead.
Step 3: Connect Your Hose Securely
Attach your garden hose to the drain valve using a jubilee clip to ensure a watertight seal. Run the other end of the hose outside to ground level where water can safely drain away. Place a small container under the connection point to catch any drips.
Pro Tip: If your drain valve doesn’t have threads for a hose, you might need a speedfit draining fitting from your local plumbing supplier: they’re about £5 and make the job much easier.
Step 4: Open All Radiator Valves
Walk around your house and fully open both valves on every radiator (the thermostatic valve and the lockshield valve). This ensures all the water can flow freely through the system when you start draining.

Step 5: Begin the Draining Process
Using your spanner or pliers, carefully open the drain valve. You’ll hear water starting to flow through your hose. Be patient: gravity does the work, but it takes time.
To speed things up, start bleeding radiators from the highest floor downward. Use your radiator key to open each bleed valve slightly: you’ll hear air being sucked into the system, which helps the water flow out faster.
Step 6: Wait for Complete Drainage
Allow 20-60 minutes for complete drainage, depending on your system size. You’ll know it’s empty when no more water flows from the hose and you can hear air entering through the bleed valves rather than water coming out.
Important: For downstairs radiators, test by slowly opening a bleed valve after the initial drainage. If water still comes out, close it quickly and wait longer.
How to Refill Your Boiler After Draining
Step 1: Close All Valves and Remove Equipment
Close all radiator bleed valves and the main drain valve. Remove your hose and let any remaining water drain outside. This is also the perfect time to add central heating inhibitor if you’re doing maintenance: simply remove a radiator blank and pour it in before refilling.
Step 2: Locate Your Filling Loop
Find your boiler’s filling loop: it’s usually a flexible braided hose with valves at each end, located near the boiler or sometimes built into the boiler itself. Some newer boilers have internal filling systems accessible through the front panel.

Step 3: Add Water to Your Radiator Heating System
Slowly open the filling loop valves to begin refilling. Start with downstairs radiators and work your way up. If you have heated towel rails, fill these last as they’re typically the highest points in your system.
Critical: Watch your pressure gauge carefully! Have someone monitor it while you fill to avoid over-pressurising. Stop when you reach 1-1.5 bar (1 bar is most common: check your boiler manual for the exact specification).
Step 4: Bleed All Radiators Systematically
Starting downstairs and working upward, bleed each radiator using your radiator key. Turn anti-clockwise until you hear air hissing out, then wait until water trickles out steadily. Close the valve and move to the next radiator.
Step 5: Restore Power and Test
Switch your boiler back on and run your central heating. As the system heats up, you may need to bleed radiators again and top up the pressure. This is completely normal: heating causes expansion and can reveal trapped air pockets.
Pro Tips and Common Mistakes to Avoid
Pro Tips:
• Add inhibitor every time you refill: it prevents corrosion and extends your system’s life
• Take photos of valve positions before starting, so you can return everything to its original state
• Keep a towel handy when bleeding radiators to catch water splashes
• Check your boiler manual for the exact pressure requirements: some need 1.5 bar, others prefer 1 bar
Common Mistakes:
• Rushing the drainage process: patience prevents airlocks
• Over-pressurising the system (anything over 2 bar can damage components)
• Forgetting to open all radiator valves before draining
• Not checking for leaks once the system is hot and pressurised
• Skipping the inhibitor: this simple addition can save thousands in future repairs

When to Call the Professionals
While draining and refilling a sealed heating system is achievable for most DIY enthusiasts, don’t hesitate to call in experts if you encounter:
• Persistent pressure drops indicating hidden leaks
• Unusual noises or kettling sounds after refilling
• Radiators that won’t heat up properly despite bleeding
• Any uncertainty about your specific boiler model’s requirements
If you’re planning more complex work like power flushing or dealing with persistent heating issues, professional diagnosis can save time and money in the long run.
Maintaining Your System After Refilling
Once you’ve successfully refilled your system, keep these maintenance tips in mind:
• Check pressure monthly: it should remain stable between 1-1.5 bar
• Bleed radiators annually or whenever you notice cold spots
• Book annual boiler servicing to catch issues early
• Add fresh inhibitor every 2-3 years or after any major work
Remember, a well-maintained heating system runs more efficiently, costs less to operate, and lasts significantly longer than one that’s neglected.
Need Expert Help in Aylesbury and Buckinghamshire?
If you’re not confident tackling this work yourself, or if you’ve discovered issues that need professional attention, Shaw’s Plumbing and Heating is here to help. Our Gas Safe registered engineers have been serving homeowners across Aylesbury, High Wycombe, and throughout Buckinghamshire for years.
We offer transparent pricing, no call-out fees for emergencies, and all our work comes with comprehensive guarantees. Whether you need a simple system refill, annual boiler servicing, or advice on upgrading your heating system, we’re just a phone call away.
Contact us today: 0800 8 247 585 or book online for fast, professional service you can trust.
This guide has been written and checked by Gas Safe registered engineers with over 15 years of experience in central heating systems across Buckinghamshire.